Open AI 在11月6号的发布会开放了很多有趣的功能,我最喜欢的还是api可以直接调用语音并流式读取音频了。
研究了一下官网只有用openai这个库来调用的例子,我不是很习惯用他的库然后就研究了一下直接用requests来发送请求直接流式拿到数据然后实时读取音频。
安装FFmpeg
在此之前你需要安装FFmpeg,我就直接给大家放下载链接了
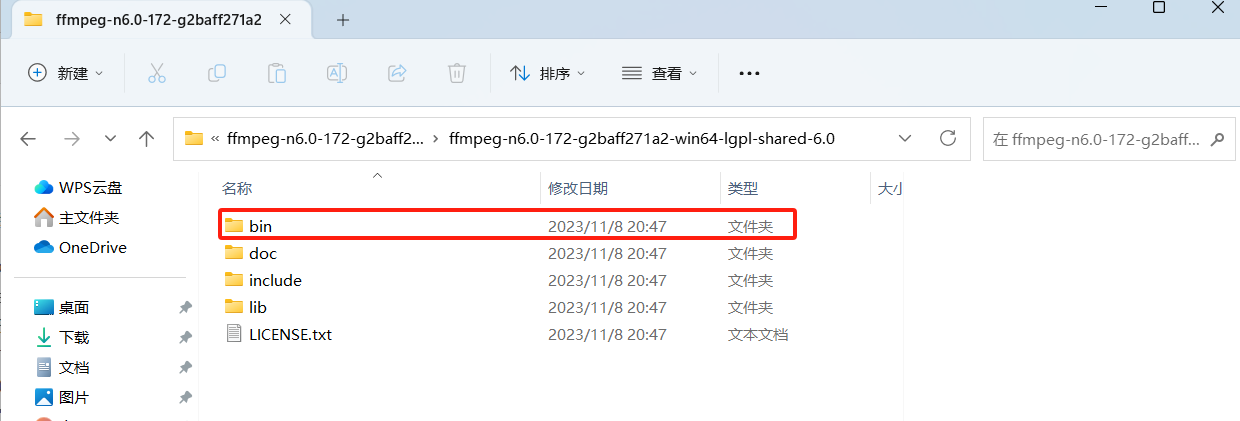
链接地址 下载链接 开源地址下载后需要解压目录进入目录找到bin文件夹并且复制该路径

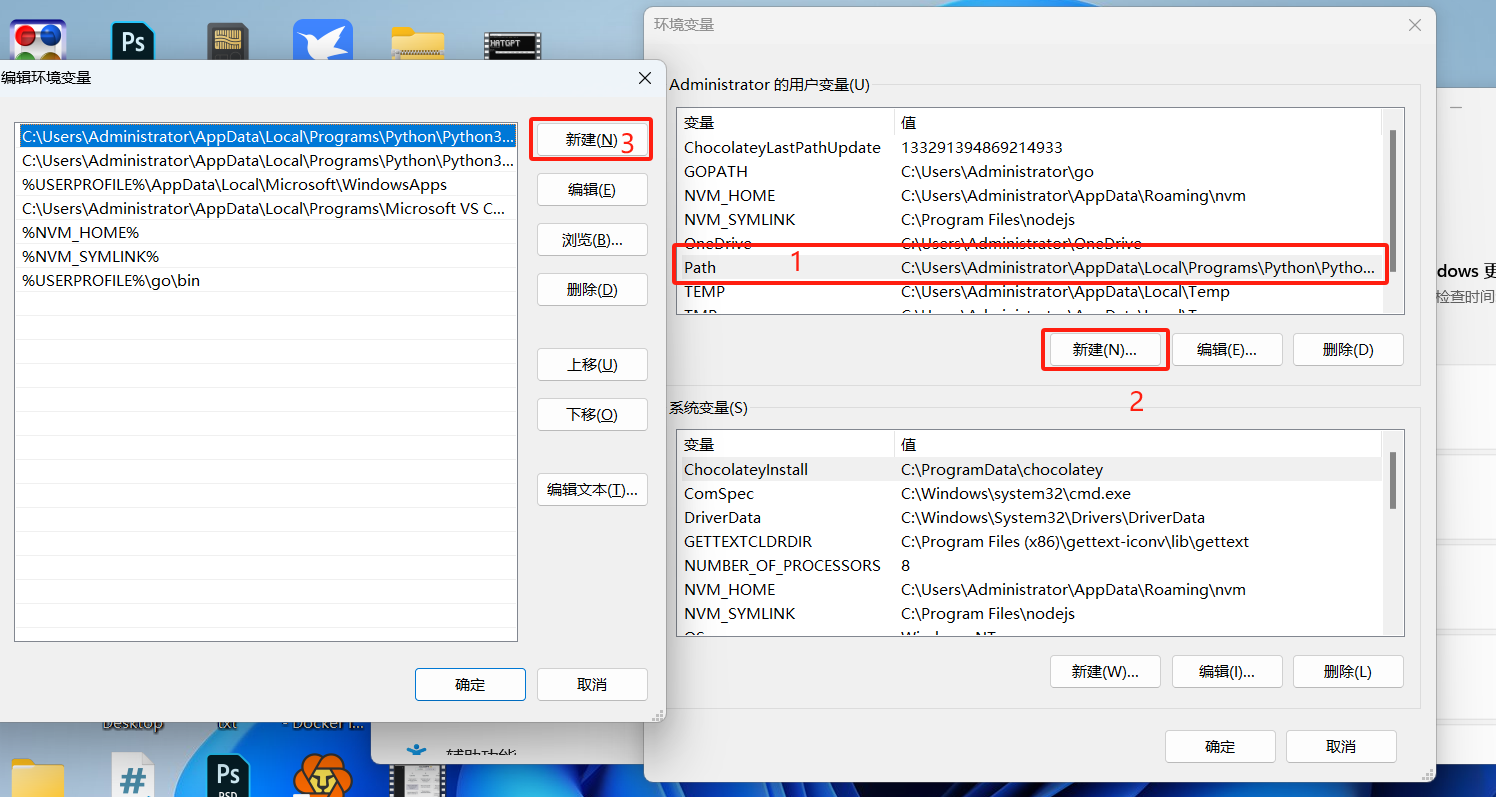
然后到设置搜索编 辑账户环境的变量
将刚刚复制的路径粘贴进去保存

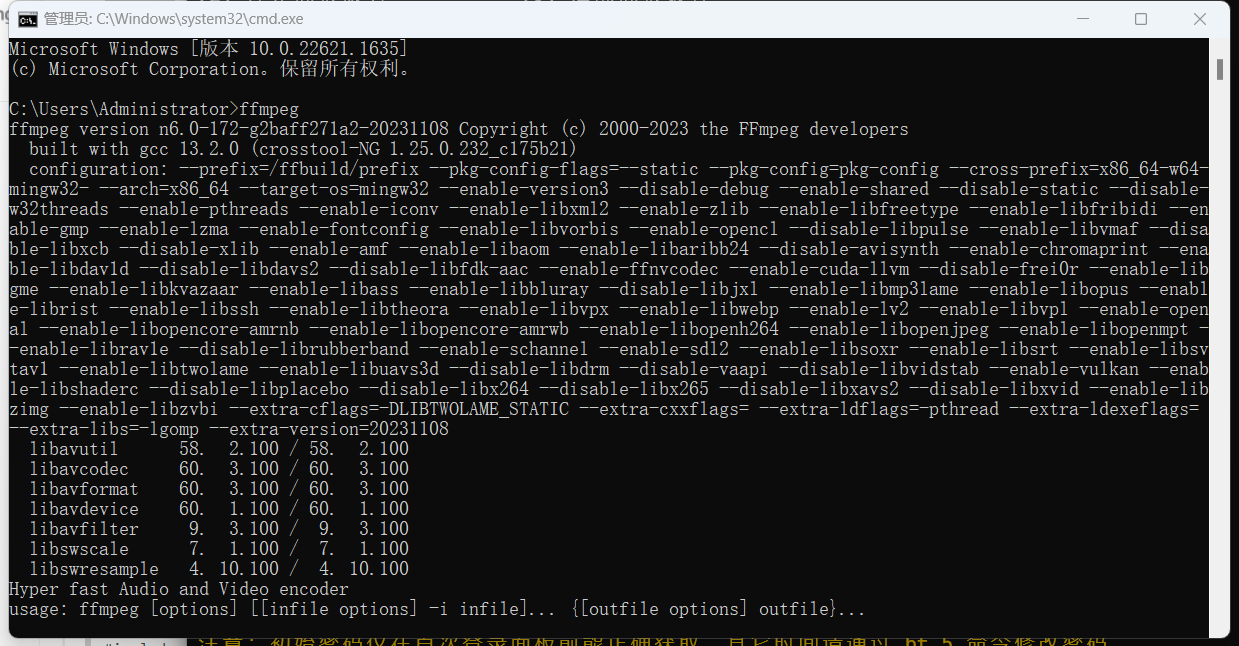
然后打开cmd命令 输入ffmpeg 出现以下信息说明配置成功

安装依赖
然后需要安装下面两个库
pip install pyaudio
pip install pydub
将下面代码保存到py文件中运行就可以实时输出音频
import requests
import pyaudio
import threading
from pydub.playback import play
from pydub import AudioSegment
import io
url = "https://api.openai.com/v1/audio/speech"
headers = {
    "Authorization": "Bearer Your KEY",
    "Content-Type": "application/json"
}

p = pyaudio.PyAudio()
stream = p.open(format=pyaudio.paInt16,
                channels=1,
                rate=16000,
                output=True)

audio_chunks = []
lock = threading.Lock()
# stop_flag = False


class ChatSpeech:
    def __init__(self,text):
        self.stop_flag = False
        self.data = {
                "model": "tts-1-hd",
                "voice": "nova",
                "input": text
            }

    def play_audio(self):
        while True:
            if self.stop_flag and len(audio_chunks) == 0:
                # stream.stop_stream()
                # stream.close()
                # p.terminate()

                break
            if len(audio_chunks) > 0:
                with lock:
                    audio_data = b''.join(audio_chunks)
                    audio_chunks.clear()
                audio = AudioSegment.from_file(io.BytesIO(audio_data), format="mp3")
                play(audio)

    def start_audio_stream(self):
        response = requests.post(url, headers=headers, json=self.data, stream=True)
        if response.status_code == 200:
            raw_stream = response.raw
            while True:
                chunk = raw_stream.read(80024)
                if chunk:
                    binary_string = ''.join(format(byte, '08b') for byte in chunk)
                    print("\033[32m{}\033[0m".format(binary_string))
                    with lock:
                        audio_chunks.append(chunk)
                else:
                    # global stop_flag
                    self.stop_flag = True
                    response.close()
                    break
    def start_speech(self):
        start_audio_thread = threading.Thread(target=self.start_audio_stream)
        play_audio_thread = threading.Thread(target=self.play_audio)

        start_audio_thread.start()
        play_audio_thread.start()


if __name__ == "__main__":
    text = "你好人类,我是ChatGPT"
    speech = ChatSpeech(text)
    speech.start_speech()
转载请注明:流水音 » ChatGPT音频分块读取并实时播放
